Table Of Content
I have cut mine to 9 inches but you can change this variable to net different results from the car. If you are using the adapter I suggest filling with a little hot glue. When we first received 3D printers I was very excited to develop new curriculum for my courses.
Build A Better Mousetrap… But It Better Be Better! - Hackaday
Build A Better Mousetrap… But It Better Be Better!.
Posted: Thu, 08 Dec 2022 08:00:00 GMT [source]
Science Fair Projects for 7th Graders
Glue two more half-sticks on top of the arm as shown (picture 3). This sandwiching technique ensures that the mousetrap car arm has a solid foundation and won't bend or break during use. Glue two craft sticks perpendicular to the half-sticks, then apply a generous layer of hot glue over all the sticks and the metal mousetrap arm (picture 2). Tape the wheels to the other short side of the frame (picture 2). Make sure these wheels are parallel to the drive wheel dowel. That being said it was a great tool for students to iterate on their designs without having to build them.
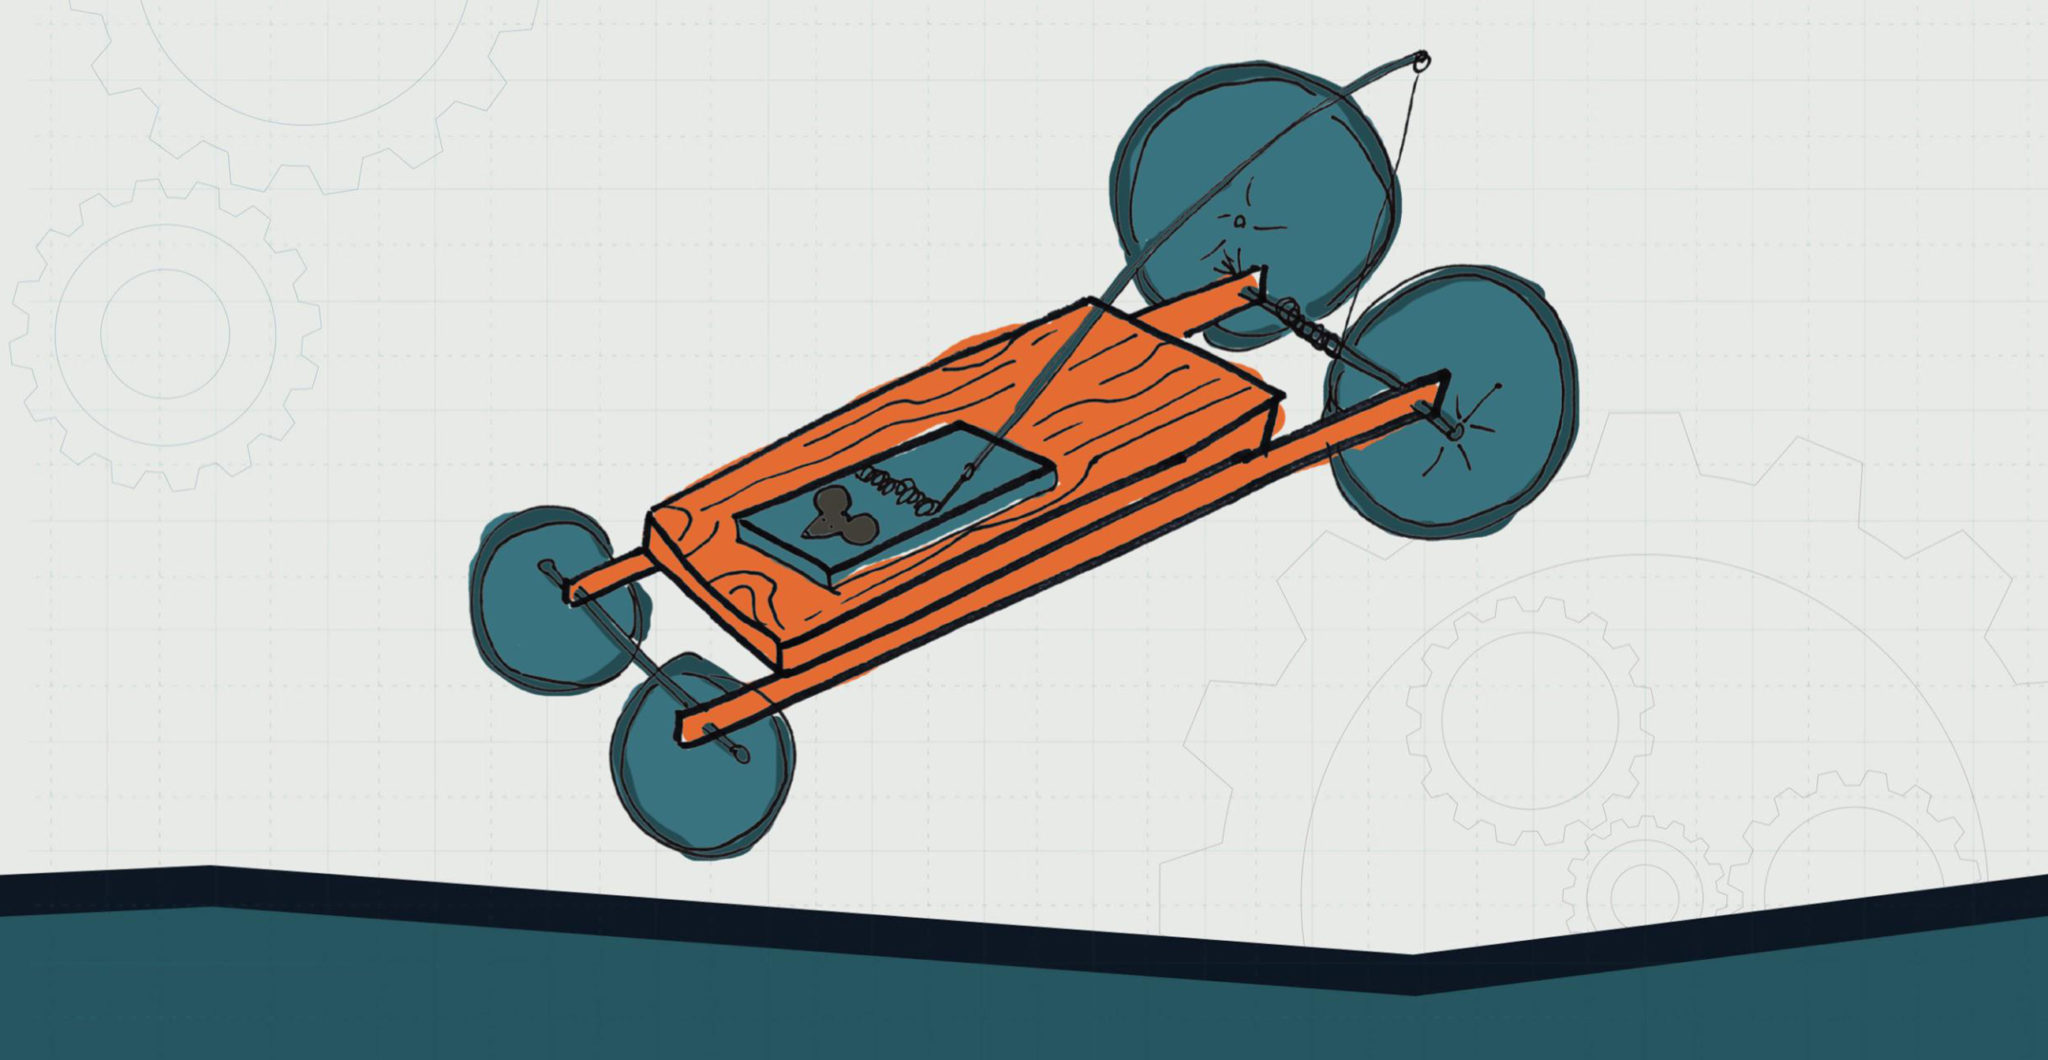
Step 6: Prepare the Mousetrap Mechanism // Dowel
The lever arm on this car is made from a square stock of a hard wood, originally I started with balsa with a T-joint but students were breaking the balsa. After handling delicate balsa structures in model airplanes it was not a problem for me. Terminology Acceleration – most of the mousetrap car lab exercises I have seen deal with total distance and measuring acceleration. Hold the snapper arm in place and wrap the string tightly around one side of the axle. Holding the string tightly, set the car on the ground and carefully let go of the trap – the string should be wound tight enough that it holds the trap in place.
Step 2: Attach the mousetraps
I have learned much from this and have tried to improve on some aspects of my design. These mousetrap cars have also been built without my help in all parts of the globe. A set mousetrap is full of potential energy which, when released, is converted to kinetic (motion) energy. The design of your car allowed that energy to be transferred to the axle to make the wheels turn. As the string was pulled, friction between it and the axle caused the axle to rotate, spinning the wheels and moving the car forward.
To be sure of the direction, put the mousetrap car on a surface and then pull it backward. Raise the flap slightly when it starts to catch, and keep turning till the trap starts loading. Hitch it as you would generally do while setting up a mouse trap. If the string snaps, the trap will close in a jiffy, and anything in its way will get hit. Thus, avoid getting in that ‘ouch’ position by being careful.
When it’s released, the engine will power up and propel the car forward. Some of these cars are built for looks, some are built for performance, and some are built to be as inexpensive as possible. One of the cheapest and easiest ways to make a car is to build a mousetrap car.
Step 8: Wind Up and Go!
The first step in deceasing friction happens in the planning of your mousetrap vehicle. As you plan your project think about all the points of friction that your design will have and then look for ways to decrease the points of friction. Because the number of moving components increases the friction point look for ways to simplify the design as much as possible. Using a lot of gears and pulleys may be a great way to change the pulling the torque but this will also lead to more points of friction that will have to be address, look for simplicity. Mechanical advantage is the ratio of output force to input force which is a tradeoff between distance moved and the amount of force. Move farther out on input side of the lever and output side moves shorter distance but with more force.
How to Build A Mousetrap Car: 11+ Free Plans
Check out some of our other fun projects, like these DIY cardboard armor plans, how to make an electric guitar, DIY dollhouses, and these DIY birdhouse plans. If not, don't worry -- read the next page for information on how you can actually build a mousetrap-car. In addition some builders have made cars that use the energy of multiple traps. Science Fair Projects for 7th Graders Science fair projects for 7th graders are a step up in complexity. Because 7th graders have a better grasp of science concepts, they’re expected to practice the scientific method in the way they approach their experiments–which...
Making Time Contest
Attach one CD to the one end of an axle tube and superglue in place, and then repeat with the second axle. Slide the axle through the holes and superglue the second CD in place only after you are sure that the axle will rotate freely. On the axle that extends past the mousetrap body, attach the zip tie to the center of the axle.
The mousetrap bar, travels through an arc of around 180 degrees and that motion has to be applied and used to move the car’s axle or wheels. If you do not want to do all this or in short start from scratch, these days you even get ready-made kits where you just have to assemble the car. There would be instructions given, so you need not think about scary things, like torsion, friction, torque, and so on! Now, let’s move on to actually making it and see how to build a mouse trap car. Axle – shaft is attached to the wheels though the hubs it should be straight as possible or the wheels will wobble.
They can alter the "arm" of the car, which in this case is the dowel, or they may want to use other techniques to improve their cars abilities. I thought helping the twins with math would be my downfall, but you guys, 8th-grade science! Last week the kids came home with a project for their science classes. Their project (whether they wanted to do it or not) was to build a mousetrap car that could travel over 4 meters. You can check out the Guinness Book of World Records website to see who holds the record for the fastest mousetrap car. You may also be able to find some clubs for people interested in building their cars or driving them, depending on where you live.
With all speed-trap racers the objective is to get to this finish line as-fast-as possible and this means higher rates of energy output. The perfect speed-trap racer will be geared to use all of its starting potential energy as fast as possible and long before the finish line. Speed-trap racers will not be as efficient and the forces of friction will be much higher when compared to a long-distance mousetrap car. Design your mousetrap racer to get to it's top speed as soon as possible.
Build a better mousetrap (car) and it will win - Grand Island Independent
Build a better mousetrap (car) and it will win.
Posted: Fri, 08 Dec 2017 08:00:00 GMT [source]
Cut four wheels out of a piece of foam board or corrugated cardboard (adult supervision is necessary). Typically for any given mousetrap project, you’ll either be supplied with a list of allowed materials, or you’ll have to set out and find them yourselves. Here’s a list of materials that are generally good to have on hand for the project if you do get the choice.

Even for time-sensitive projects, we are able to work 24/7 between the US and Japan. We solve problems through design and make the impossible possible. He believes it is still very important to have a studio that can pen futuristic designs away from the politics of headquarter-based design studios. He says he is saddened to see that Calty has become just another production design studio in Toyota's network, effectively working as a backup studio to Japan.


No comments:
Post a Comment